
Knowing how interior designers use 3D renderings to win residential refurbishment projects before a single sample board is made is one of those things that separates designers who consistently land good clients from those who keep losing pitches to competitors with flashier presentations. We see it from our side of the desk all the time. A designer comes to us with floor plans, a moodboard folder, and a clear vision — and within a few days, they walk into a client meeting with photorealistic interior renders that show exactly how that tired Victorian terrace or dated 1990s apartment will look after the transformation. The result? Clients sign off faster, scopes get confirmed earlier, and the designer secures the project before anyone else gets a look in.
Residential refurbishment is a particularly competitive space. Unlike new-build interiors, where clients are buying something that doesn’t exist yet and expect visualisations, refurb clients are looking at a real space they already own. They can touch the existing walls, see the current flooring, and compare any proposal against what they’re already living with. That creates a very specific psychological challenge. Words and fabric swatches don’t bridge the gap between “what is” and “what could be” — but a well-crafted render absolutely does. It makes the proposal feel real before a single decision is committed to on site.
This post breaks down how smart interior designers are using 3D rendering at the pre-project stage — specifically to win the pitch, justify their fee, and set expectations before procurement even starts. It’s practical, it’s technical, and it reflects what actually works based on the briefs we receive and the results our clients report back.
Why the Traditional Pitch Approach Falls Short in Refurbishment
Most interior designers pitch residential refurbishment projects with some combination of Pinterest boards, material samples, hand sketches, or at best, a basic SketchUp model with flat colours. That approach worked ten years ago. It works less and less now, for a straightforward reason: clients have been exposed to photorealistic imagery everywhere — on Instagram, on property platforms, in developer brochures. Their visual expectations have risen, even if they can’t articulate exactly why a pitch feels flat.
The other problem with sample boards and moodboards is that they require interpretation. A client looks at a linen swatch next to a paint chip and a tile image torn from a magazine, and they’re being asked to mentally assemble a room. Most people — even well-educated, design-literate clients — struggle with that spatial leap. They nod politely in the meeting and say “yes, I can see it.” Often, they genuinely cannot. And that uncertainty translates directly into hesitation. Hesitation loses you the project to the designer who made them feel certain.
3D rendering removes the interpretation layer entirely. When you show someone a photorealistic render of their actual living room — their window proportions, their ceiling height, their fireplace position — with your proposed scheme applied, there’s no ambiguity. They can see it. That shift from “I think I understand” to “I can see it clearly” is where pitches are won.
How Interior Designers Use 3D Renderings to Win Residential Refurbishment Projects Before a Single Sample Board Is Made — The Technical Side
The workflow that works best starts with geometry. A good refurb render begins with an accurate 3D model of the existing space. This means taking or receiving measured drawings of the room — not just a floor plan, but ceiling heights, window and door positions, architrave profiles, coving details if they exist, and any fixed structural elements that can’t move. If the designer hasn’t had the property professionally measured, even a careful site sketch with dimensions gives us enough to build a workable model.
From there, the designer’s proposed scheme gets layered in. New flooring material with accurate texture scale. Wall colours or coverings with correct reflectivity. Joinery — kitchen units, built-in wardrobes, bookshelves — modelled to spec. Furniture that reflects the actual pieces being specified, not generic blocks. Lighting that represents the fixture types and positions the designer intends to specify. This level of specificity is what separates a useful pre-pitch render from a generic “pretty room” image that could belong to any project.
Lighting setup deserves particular attention. Residential interiors are heavily mood-dependent, and the same room can feel cold and clinical or warm and inviting depending entirely on how the light is handled. In our studio, we always ask the designer what time of day and what atmosphere they want to convey. A render lit for a bright weekend morning communicates something different from one showing the same space in late afternoon with warm downlights active. Both might be valid — but choosing intentionally, rather than defaulting to whatever the renderer’s default settings produce, makes a significant difference to how the client receives the image.
For anyone wondering about turnaround, a well-briefed single-room refurb render typically takes two to four working days from receipt of drawings and brief. More complex multi-room projects take longer. We’ve written a detailed guide on how long does architectural 3d rendering actually take a projectbyproject turnaround guide if you want the specifics broken down by project type.
What Renders to Prepare Before the Pitch Meeting
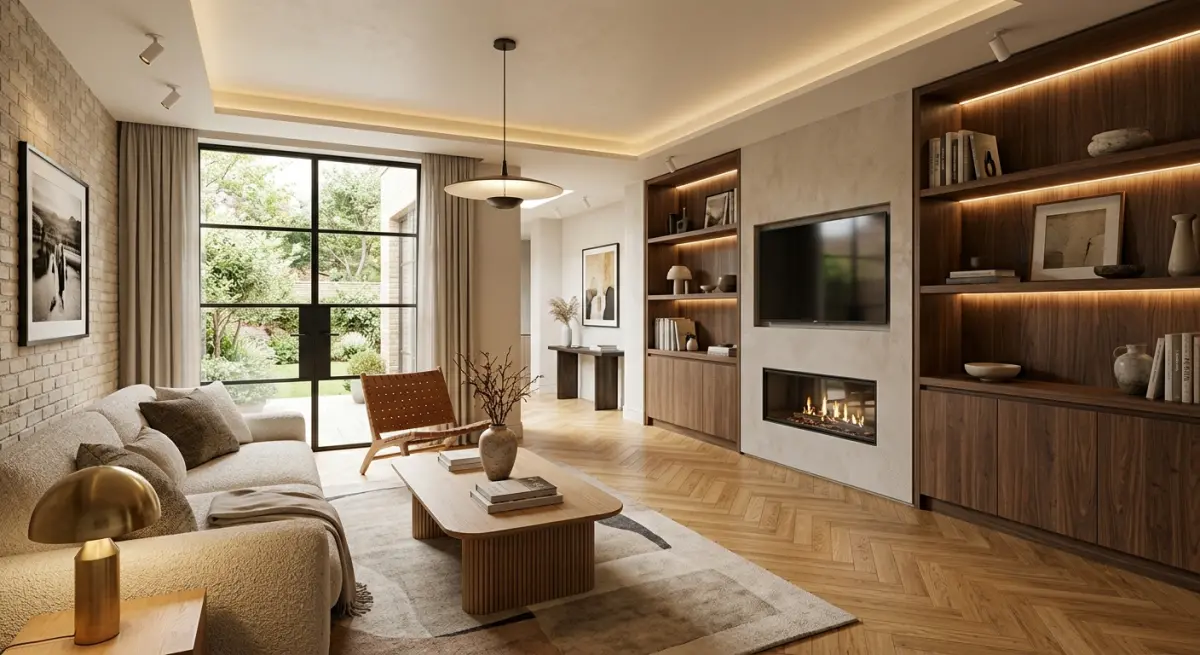
Designers often ask us how many renders they need for a pitch. The honest answer is: enough to tell the story, not so many that the meeting becomes a slideshow. For a typical residential refurb pitch covering a living space, kitchen, and master bedroom, three to five well-chosen viewpoints will outperform fifteen mediocre ones every time.
Prioritise the views that carry the most emotional weight for the specific client and brief. If a kitchen extension is the heart of the project, the kitchen render should be the one you’ve invested most in. If the client has mentioned repeatedly that they want a cosy, hotel-style master bedroom, lead with that. The renders should answer the client’s specific anxieties and aspirations — not showcase every corner of every room equally.
Consider also pairing renders with a simple 3D floor plan rendering to give spatial context. Clients who struggle to read 2D CAD plans respond much better to an axonometric or bird’s-eye 3D floor plan that shows the layout in a legible, three-dimensional way. This is particularly useful in refurb projects where a layout change — knocking through a wall, reconfiguring a bathroom — is central to the proposal.
Handling Client Feedback Before the Design Is Fixed
One of the most useful aspects of using renders pre-pitch is that the revision loop happens before you’re engaged, which means before you’re spending fee time on it. A designer can share a preliminary render with a trusted contact or colleague, get instinctive feedback, and adjust the scheme before the client ever sees it. This kind of dry-run quality check isn’t possible with a sample board — you can’t quickly swap out a floor finish on a moodboard the way you can update a material in a 3D scene.
This is also relevant once you’re in the design stage proper. As we’ve explored in our post on how architects use 3d interior renderings to reduce client change requests during the design stage, the same principle applies to interior designers working in residential refurb: when clients can genuinely see the proposed design, they make better, faster decisions and request fewer expensive changes later. The render pays for itself in avoided revisions.
The practical implication is that pre-pitch renders and design-stage renders serve slightly different purposes. Pre-pitch renders need to be persuasive and aspirational — they should make the client want to commission the work. Design-stage renders need to be accurate and decision-enabling — they should give the client enough information to confirm or revise. Understanding this distinction helps designers brief the studio correctly at each phase.
Material Accuracy and Why It Matters More Than You Think
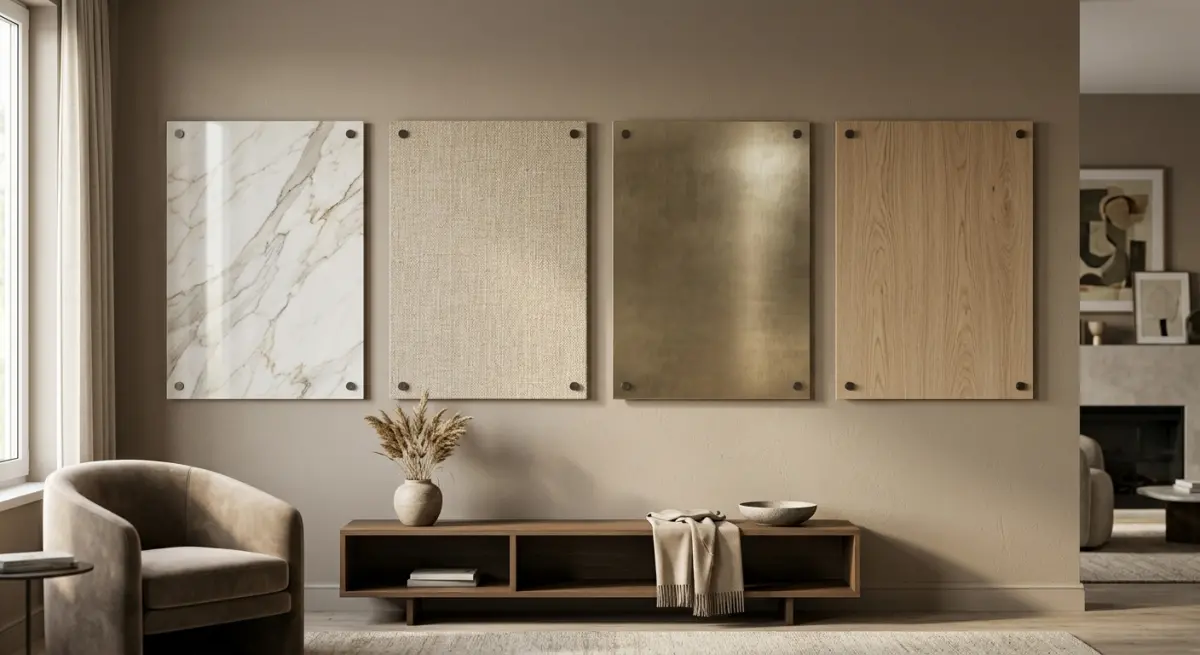
A common mistake is treating renders as mood pieces — atmospheric images that capture a feeling — while leaving the material specification vague. That works for marketing. It doesn’t work for winning a refurb pitch, where the client is making a real financial commitment and needs to trust that what they’re seeing is what they’ll actually get.
When we render a specific marble-effect porcelain tile, we use a texture map based on the actual product where possible, at the correct scale for the room. When we render a painted wall finish, the colour matches the specified paint reference. Joinery profiles reflect the actual specification. This level of material specificity builds client confidence in a way that a beautiful-but-vague atmospheric image simply doesn’t. It says: this designer has already thought through the details.
The same discipline applies to furniture. If the designer has already identified specific FF&E pieces — a sofa, a dining table, a statement pendant — modelling or sourcing close 3D approximations of those pieces is worth the extra time. Generic placeholder furniture is the fastest way to make a render feel like stock imagery rather than a genuine proposal for a specific home.
Comparing Options: Giving Clients a Visual Choice
One technique that consistently works well at pitch stage is presenting two render variants of the same space — different colourways, different joinery styles, or a more contemporary versus more classical treatment — using the same camera view. This does two things. First, it demonstrates that you’ve thought through alternatives rather than just defaulting to your own preference. Second, it gives the client something to react to, which is psychologically much easier than asking them to conjure a preference from abstract description.
| Pitch Asset | What It Communicates | Limitation |
|---|---|---|
| Sample Board / Moodboard | Material palette, general aesthetic direction | Requires client to mentally assemble the space |
| Hand Sketch / SketchUp Block Model | Spatial layout, rough proportions | No material, light, or atmosphere — hard to “feel” the space |
| Photorealistic 3D Render | Complete spatial, material, and lighting proposal | Requires good source drawings and a clear brief to be accurate |
| 3D Render Variants (A/B) | Design options side by side — easy client decision-making | Higher upfront cost, requires more briefing time |
| 3D Floor Plan | Spatial layout in readable, non-technical format | Doesn’t replace interior renders for material/lighting decisions |
What Interior Designers Get Wrong When Briefing a Render Studio
The most common problem we see is under-briefed jobs. A designer sends us a floor plan, a Pinterest board, and a one-line brief — and expects a pitch-quality render. It doesn’t work that way. Good renders come from specific briefs: exact paint references, identified tile products, confirmed joinery heights and profiles, furniture pieces, and a clear brief on lighting atmosphere and time of day.
The second common mistake is leaving it too late. A render brief that arrives on Monday for a pitch on Wednesday is a problem. Not because we can’t move quickly, but because rushed renders don’t allow for the back-and-forth that produces genuinely accurate, pitch-ready imagery. Build the rendering process into your pitch preparation timeline — not as a last-minute visual polish, but as a core part of how you develop and communicate the concept.
If you want a clear guide on how to structure your brief effectively, we’d recommend reading our post on how to brief a 3d rendering studio what architects and developers need to prepare before project kickoff. The principles apply equally whether you’re an architect or an interior designer.
Conclusion
The pitch for a residential refurbishment project is won or lost on confidence — the client’s confidence that the designer understands their home, understands their brief, and can deliver a result they’ll be happy living with. Understanding how interior designers use 3D renderings to win residential refurbishment projects before a single sample board is made isn’t just a technical question — it’s a commercial strategy. Photorealistic renders do what no sample board can: they show the client their future home, in their existing space, with their specific scheme applied. That clarity closes pitches.
If you’re an interior designer looking to use professional 3D rendering as part of your client pitch process, we work with designers at exactly this stage — from pre-pitch concept renders through to design-development imagery used to confirm specifications before procurement. Our residential interior rendering service is built around exactly this kind of brief. Get in touch via our contact us page to discuss your next project.
Frequently Asked Questions
How do interior designers use 3D renderings to win clients before creating sample boards?
Interior designers use 3D renderings to present photorealistic visualizations of the proposed design concept during the initial pitch, allowing clients to emotionally connect with the space before any physical materials are sourced. This approach replaces traditional mood boards and sample boards as the primary persuasion tool, enabling designers to communicate color palettes, furniture layouts, lighting schemes, and material finishes in a single compelling image. Clients who can clearly see the finished result are far more likely to sign a contract on the spot, dramatically improving the designer's conversion rate.
What types of 3D renderings are most effective for residential refurbishment proposals?
Photorealistic still renderings of key rooms such as living areas, kitchens, and master bedrooms tend to have the highest impact in residential refurbishment pitches because they mirror how homeowners visualize their own spaces. Walkthrough animations and 360-degree virtual tours are increasingly popular for larger projects, giving clients an immersive experience that static images cannot replicate. The most effective approach combines hero-angle still renders with one interactive element, balancing visual impact with manageable production cost and turnaround time.
How much does it cost to produce 3D renderings for an interior design pitch, and is it worth the investment?
Professional 3D renderings for a residential interior design pitch typically range from $150 to $600 per room depending on the level of detail, the complexity of the space, and whether an in-house tool or specialist rendering studio is used. When weighed against the average value of a residential refurbishment project, which can run from $30,000 to well over $150,000, investing $500 to $1,500 in pre-pitch visuals represents a very small percentage of potential revenue. Designers who consistently present 3D renders report higher close rates and fewer rounds of costly revisions, making the upfront investment highly profitable over time.
Can interior designers create 3D renderings in-house, or do they need to outsource to a specialist?
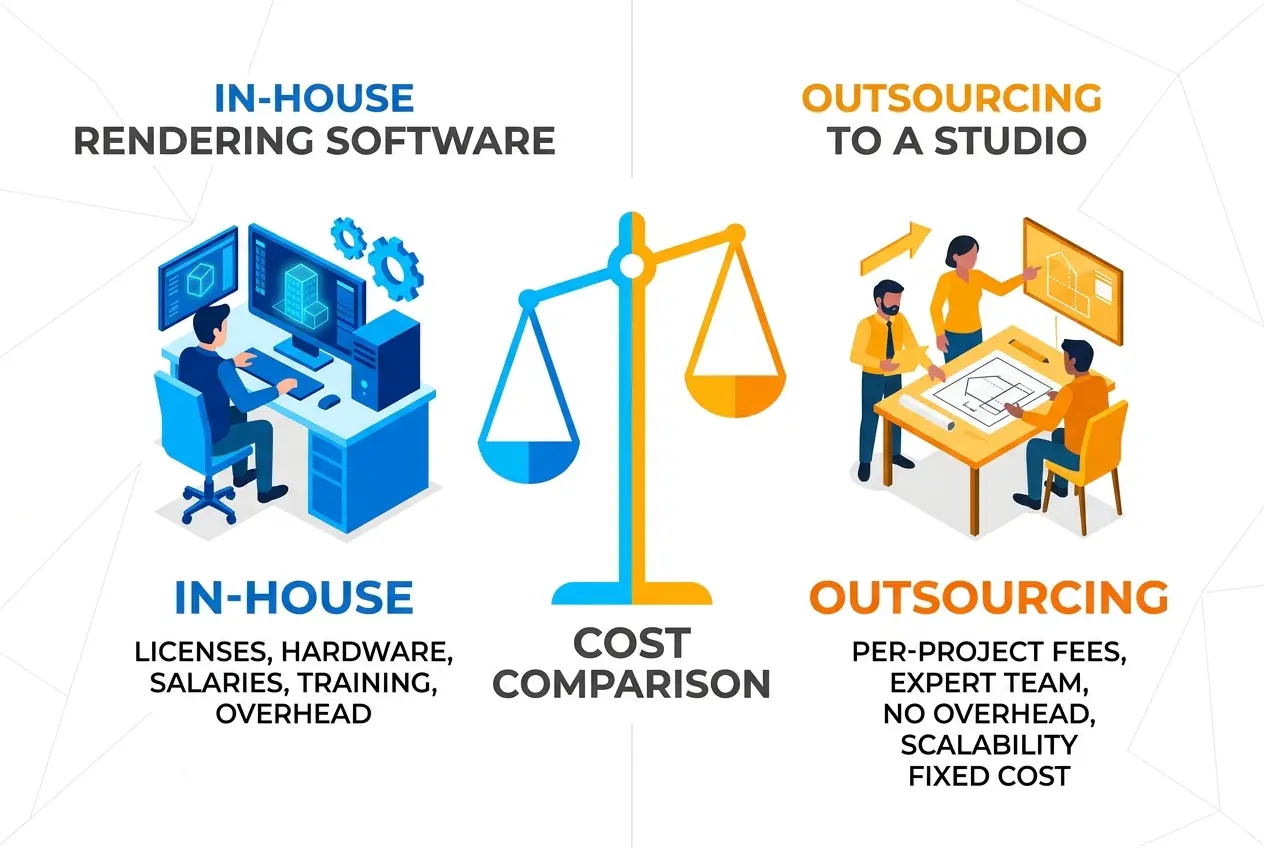
Many interior designers now create their own renderings using accessible software platforms such as SketchUp with V-Ray, Archicad, or cloud-based tools like Cedreo and Planner 5D, which are specifically designed for non-engineers and have relatively short learning curves. However, for high-stakes pitches on premium residential projects, outsourcing to a specialist 3D visualization studio often produces a higher quality output that is more likely to impress discerning clients. The practical choice depends on project budget, turnaround deadlines, and the designer's existing technical skill set, with many studios using a hybrid approach of in-house drafts refined by an external renderer.
How do 3D renderings help interior designers handle client objections and reduce mid-project changes on refurbishments?
When clients can see a detailed visualization of the finished space before work begins, they are able to raise concerns about color choices, furniture scale, or layout at the concept stage rather than halfway through a costly refurbishment. This proactive alignment significantly reduces the expensive change orders and delays that typically erode project margins and damage client relationships. Interior designers who present 3D renderings at pitch stage consistently report smoother project delivery because expectations have been visually set and mutually agreed upon before a single contractor is booked or a sample ordered.