
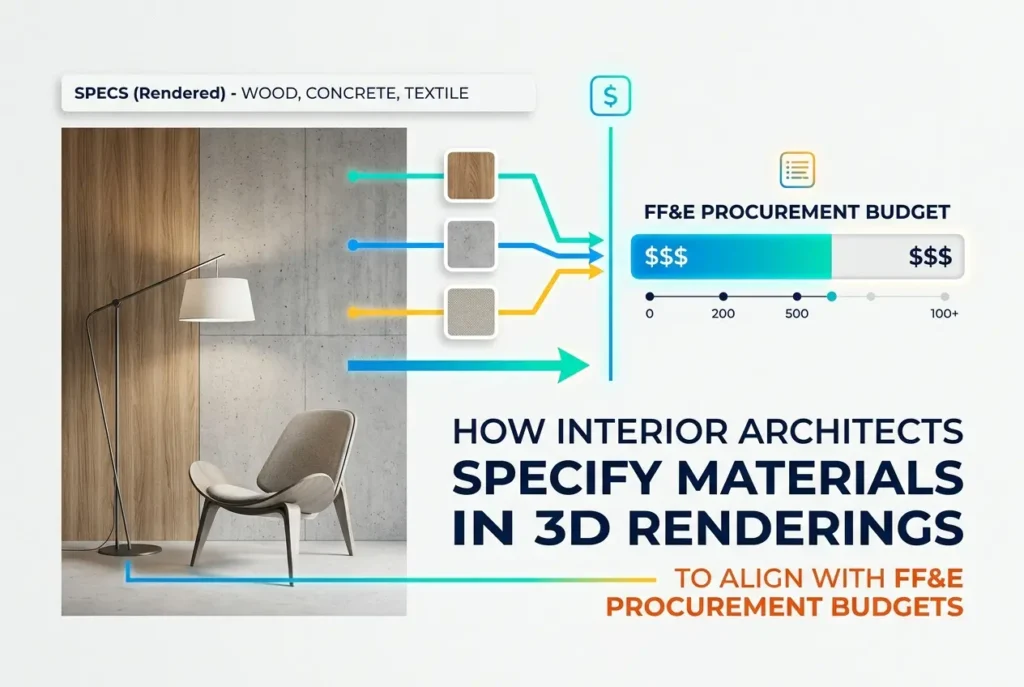
A designer once sent us a beautiful walnut and brushed-brass interior render for a boutique hotel lobby, then quietly asked if we could “make it look a bit more like laminate” once the FF&E budget came back from procurement. That request happens more often than most people admit. Materials in a render are not just a visual decision — they are a financial commitment the moment a client sees them and falls in love with the look. That’s exactly why How Interior Architects Specify Materials in 3D Renderings to Align With FF&E Procurement Budgets has become one of the quieter but more important skills in this profession. Get the material specification wrong at render stage, and you either blow the budget or spend weeks managing disappointment later.
In our studio, we sit at an odd intersection of this problem. We are not the ones setting the FF&E budget, but every material we render becomes a reference point the client anchors to. If we render a stone that costs four times more than what’s actually budgeted, we’ve created a expectation gap that someone else has to close. So we’ve developed habits — some ours, some borrowed from smart architects we work with — that keep the visual and the procurement sheet talking to each other.
This post is about how that alignment actually happens in practice: what information architects need to give us before rendering starts, how material substitution works without wrecking the design intent, and where the common breakdowns occur between the render and the purchase order.
Why Material Specification in Renders Is a Budget Document, Not Just a Visual One
Every material we place in a 3D scene carries an implied cost tier, whether anyone states it or not. A high-gloss lacquer reads as expensive. A textured laminate reads as economical, even if the actual price difference between two options is smaller than it looks. Clients respond to what they see, not to the spec sheet behind it. So when an architect hands us a moodboard without cost tiers attached, we’re guessing — and our guess usually skews toward “make it look premium,” because that’s what sells the design in the meeting.
The problem is that render becomes the reference everyone remembers. Six months later, when the FF&E schedule comes back with a substituted quartz instead of the marble we rendered, the client feels like something was taken away, even if the substitution was always the plan. Treating the render’s material list as a live budget document — not just a texture library — prevents that entire conversation from happening.
How Interior Architects Specify Materials in 3D Renderings to Align With FF&E Procurement Budgets in Practice
The architects who do this well share one habit: they send us a material schedule before we start texturing, not after. It doesn’t need to be a finished FF&E sheet — a simple table with product category, target price band, and finish reference is enough. We then match render materials to that band using visual proxies that read correctly under our lighting setup without overpromising on cost.
| FF&E Category | Budget Tier | Render Material Approach |
|---|---|---|
| Flooring | Economy | Matte laminate or vinyl with subtle grain variation, low reflectivity |
| Flooring | Mid-range | Engineered timber or porcelain tile with realistic seam pattern |
| Flooring | Premium | Natural stone or solid hardwood with veining/grain sourced from real reference |
| Wall Finishes | Economy | Painted plaster, flat sheen |
| Wall Finishes | Mid-range | Textured wallpaper or wood panelling with moderate sheen |
| Wall Finishes | Premium | Fabric wall upholstery, stone cladding, or metal inlay detailing |
| Furniture Upholstery | Economy | Solid-colour polyester blend, simple weave |
| Furniture Upholstery | Premium | Leather or velvet with visible texture and stitching detail |
This kind of table doesn’t need to be exhaustive, but it gives us a defensible reason for every material choice — and it means when the FF&E buyer eventually sources the real product, the gap between render and reality is small enough that nobody notices.
Matching Render Materials to Real Procurement Catalogues

One thing that saves everyone time: if the architect already has a shortlist of actual suppliers or SKUs, we ask for the product photos or spec sheets directly. Rendering from a real manufacturer’s material — even approximated rather than exactly PBR-matched — means the final render looks like something that can genuinely be bought, not an idealized version that only exists in 3D. We’ve had architects send us tile catalogue PDFs mid-project specifically so we could swap a rendered stone for the exact quarried finish that was actually going into the procurement order. It’s a small extra step but it removes the single biggest source of client disappointment: the “the render doesn’t look like what I got” phone call.
This becomes even more important on projects using our residential interior rendering or commercial interior rendering services where FF&E is a huge share of total project cost — hospitality and high-end residential especially. On commercial fit-outs, we’ve seen this play out clearly in the kind of work described in our piece on interior rendering for workplace fit-out how commercial refurbishment firms win corporate clients with pre-build visuals, where the render needs to survive scrutiny from a facilities manager who already has a furniture budget locked in.
Where Substitutions Go Wrong (And How to Avoid It)
The most common mistake is treating material substitution as a purely visual swap late in the process — changing a texture map without reconsidering how it reads under the same lighting. A dark walnut swapped for a lighter oak doesn’t just change color; it changes how the whole room’s contrast and mood reads, which can undercut the design story the render was built to tell.
The second mistake is inconsistency across a render set. If one image shows premium stone counters and a matching image from another angle shows a slightly different — cheaper-looking — version because a designer asked for a “quick tweak” without updating the whole scene, procurement teams notice the mismatch and start asking questions nobody wants to answer.
The third, and maybe most costly, mistake is leaving material specification to the very end of the render process. Texturing is one of the last visual layers we apply, but it should be one of the first things locked from a budget standpoint. We always recommend architects finalize their FF&E tier decisions — even roughly — before final renders begin, not after.
Lighting’s Role in Material Perception
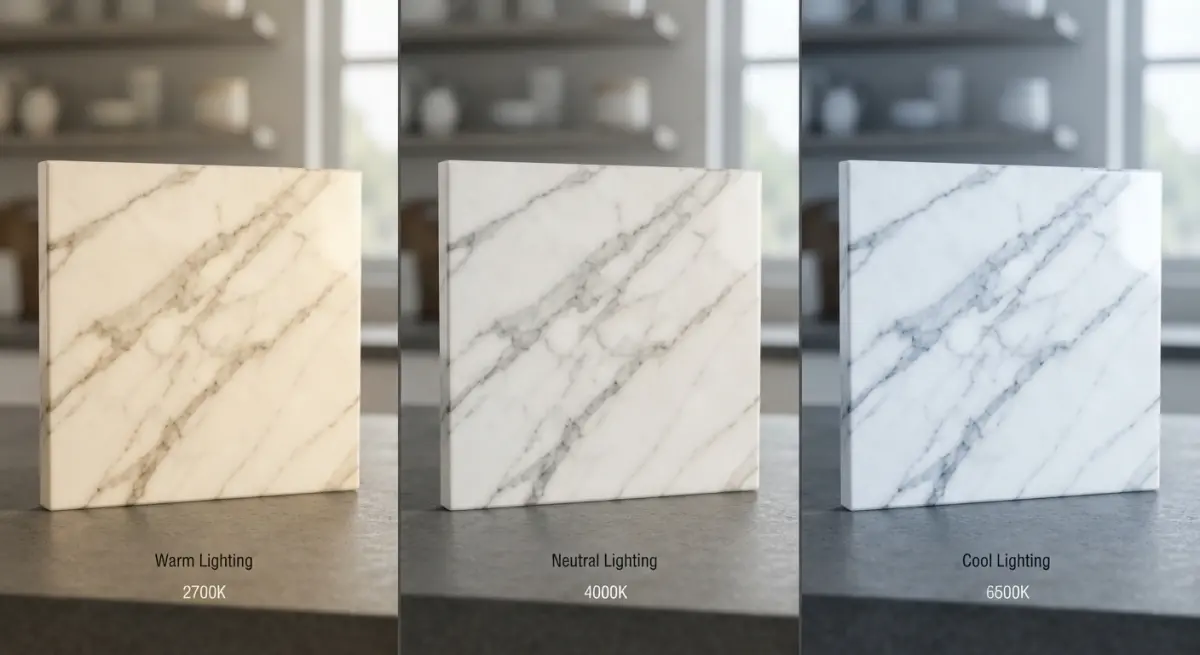
Material cost perception isn’t only about the texture itself — lighting temperature changes how expensive or economical a surface reads. Warm lighting makes timber and brass feel rich and residential; cool lighting can make the same materials feel clinical or downgrade their perceived value. We go into this in more depth in our post on warm vs cool lighting in residential interior rendering how colour temperature changes buyer perception, but the short version for FF&E alignment is this: if your budget assumes a mid-range finish, don’t light the scene like a five-star hotel photoshoot. The lighting has to match the tier as much as the material itself does.
What Actually Works: Practical Takeaways
- Send a material tier sheet before texturing starts. Even a rough three-column table (item, budget band, reference image) saves rounds of revision later.
- Use real supplier references where possible. A photo from an actual catalogue beats a generic “luxury marble” texture every time.
- Lock materials before final lighting passes. Texture and light interact — changing one late means redoing the other.
- Keep a shared master file of approved materials across the render set. This avoids the mismatch between images that procurement teams catch immediately.
- Flag “aspirational” materials clearly. If a client wants one hero shot with a premium finish for marketing even though the actual spec is more modest, say so explicitly in the brief — we can render both versions without confusion.
We’ve also found that architects who’ve worked with us on multiple projects get faster at this over time — the same instinct that helps someone win a project using how interior designers use 3D renderings to win residential refurbishment projects before a single sample board is made is the same instinct that keeps material specs honest once the contract is signed.
Bringing It Together
Material specification in rendering is never just a texture decision — it’s a quiet negotiation between design ambition and what procurement can actually deliver. The architects who manage this well treat the render brief as a budget conversation from day one, give us real cost tiers to work from, and stay consistent across every image in the set. Do that, and the render stops being a source of disappointment down the line and becomes what it should be: an accurate preview of the room that gets built.
If you’re preparing FF&E-sensitive interior visuals for an upcoming project and want a studio that treats material accuracy as seriously as the visual polish, get in touch through our contact us page and we’ll walk you through how we handle material specification on projects like yours.
Frequently Asked Questions
How do interior architects ensure 3D rendering materials match actual FF&E procurement budgets?
Interior architects create detailed material specification sheets alongside renderings, linking each visualized finish to real vendor pricing and SKU data before final design approval. This process involves cross-referencing rendered textures with procurement catalogs to verify cost accuracy, preventing budget overruns when items are actually purchased. Many firms use integrated software that pulls live pricing data directly into the rendering workflow to maintain consistency.
What software tools help align 3D rendering specifications with FF&E budgets?
Popular tools include Revit and SketchUp integrated with FF&E databases, alongside specialized procurement platforms like Material Bank or CET Designer that sync material libraries with real-time vendor pricing. These platforms allow designers to substitute visually similar but budget-appropriate materials without recreating entire renderings. Cloud-based collaboration tools also enable procurement teams to review and approve specifications directly within the rendering environment.
Why do rendered materials sometimes not match the final procured products in interior design projects?
Discrepancies often occur because renderings prioritize visual appeal using high-resolution digital textures that may not reflect actual material availability, lead times, or pricing tiers. Designers sometimes select placeholder materials during early concept phases that get finalized later, causing mismatches if budget constraints force substitutions afterward. Clear documentation and early vendor consultation during the rendering phase significantly reduce these gaps.
How can designers balance client aesthetic expectations with FF&E budget constraints during the rendering phase?
Designers typically present tiered material options within renderings, showing premium, mid-range, and budget-friendly alternatives that achieve similar visual outcomes at different price points. This transparency allows clients to make informed decisions early, reducing costly revisions after procurement begins. Value engineering discussions during the rendering review stage help align creative vision with realistic financial parameters.
What role does material specification documentation play in the FF&E procurement process for interior architecture projects?
Material specification documents serve as the definitive bridge between creative renderings and actual purchasing, detailing exact finishes, quantities, suppliers, and costs for every visualized element. This documentation ensures procurement teams order the correct items without ambiguity, minimizing costly errors or delays during installation. Well-organized specs also provide an audit trail that helps track budget adherence throughout the project lifecycle.


1 comment