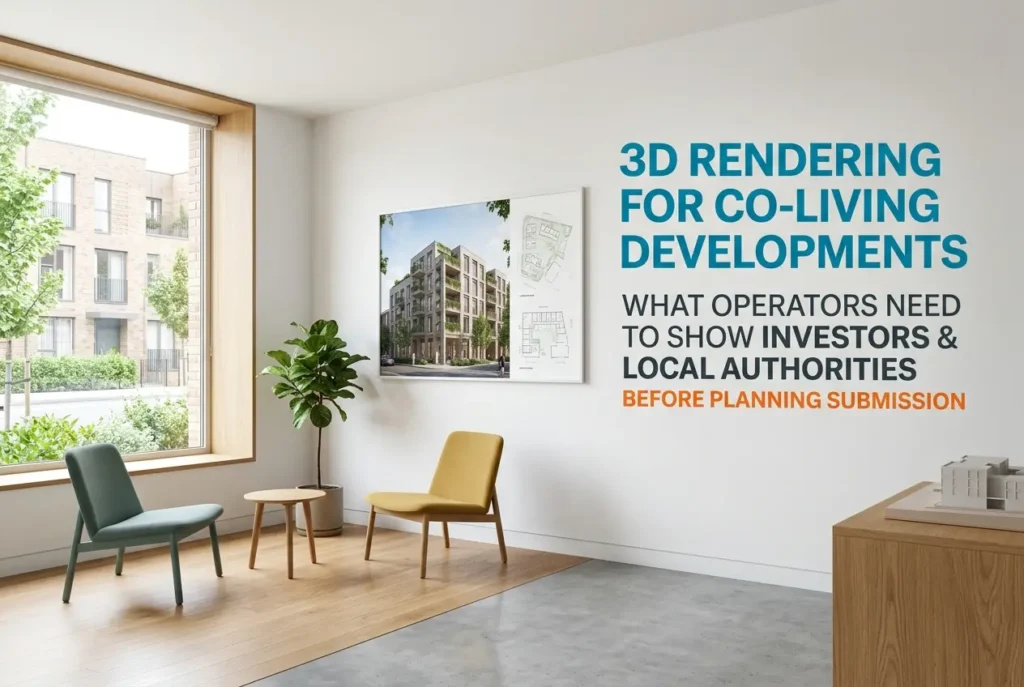
Co-living developments occupy a genuinely complicated position in the planning and investment landscape. They’re not quite residential, not quite hospitality, and not quite student accommodation — which means the people you need to convince, whether that’s a local planning authority or a private equity investor, are often working from assumptions built around other asset classes. 3D Rendering for Co-Living Developments: What Operators Need to Show Investors and Local Authorities Before Planning Submission is a topic we get asked about regularly, and for good reason. The visual brief for a co-living scheme has to do a lot more heavy lifting than a standard apartment block. You need to communicate density, communal functionality, privacy, and neighbourhood fit — all at once, all before a brick has been laid.
We’ve worked on co-living briefs where the architect had excellent drawings and a solid design narrative, but the planning pack looked thin because the renders didn’t show what the scheme actually offered. A planning officer looking at a co-living application doesn’t just want to see the exterior massing. They want to understand how residents will actually live there. Investors want the same thing for different reasons — they’re asking whether the amenity offering is strong enough to justify the operating model. Both audiences are reading from the same set of images, but with completely different questions in mind. That’s why the visual strategy for co-living needs to be deliberate and layered.
This post walks through what we’ve learned about what works, what gets skipped too often, and how to build a render package that covers both your planning submission and your investor deck without starting from scratch twice.
Why 3D Rendering for Co-Living Developments Demands a Different Visual Approach
Standard residential renders focus on the unit. Co-living reverses that logic — the unit is almost secondary to the communal experience. A private room in a co-living scheme might be compact by conventional standards, but the scheme sells itself on rooftop terraces, co-working lounges, cinema rooms, shared kitchens, and curated social programming. If your render pack leads with bedroom shots and a façade elevation, you’ve already lost the plot.
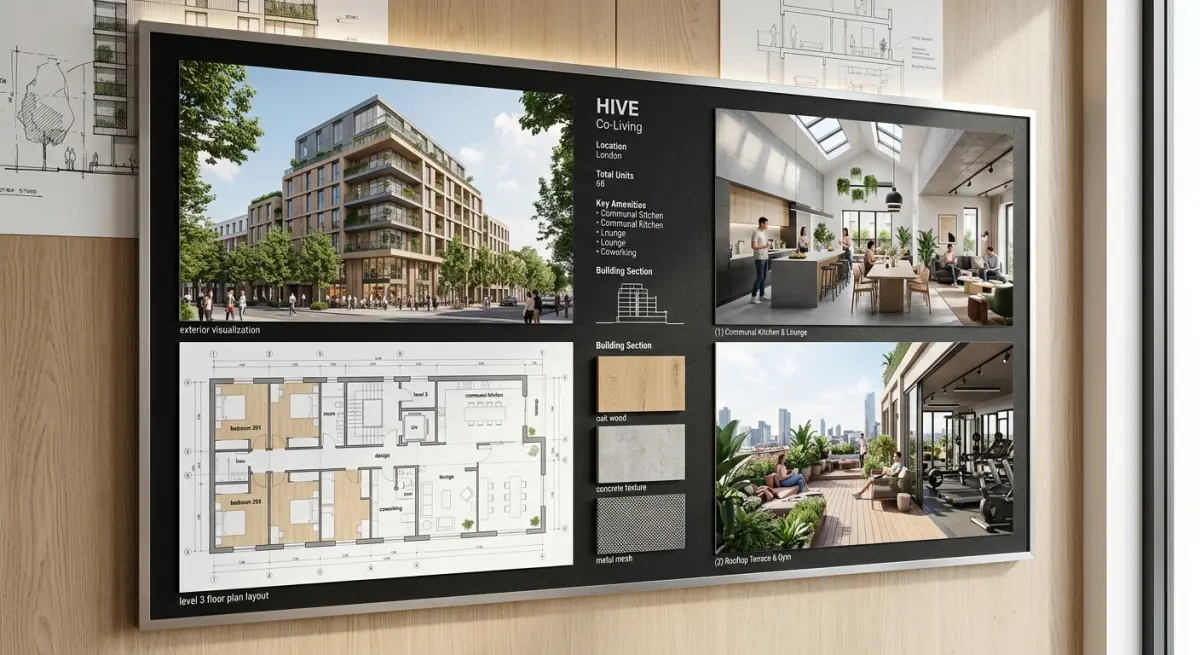
The visual hierarchy should reflect the actual value proposition. That means amenity spaces need to be rendered with the same care — or more — than the private rooms. We typically recommend operators plan for at least one hero render per key communal area: the co-working zone, the main social kitchen, the outdoor amenity space, and any wellness features like a gym or quiet lounge. These aren’t just nice-to-haves. They’re the answer to the investor’s core question: “Why would someone choose this over a conventional flat?”
Interior styling matters significantly here too. Co-living operators have a specific demographic in mind — typically young professionals, often internationally mobile — and the renders need to look like they’re designed for that person. The material palette, the furniture specification, the lighting mood, even the accessories visible in the frame all contribute to whether the render reads as credible. Generic hotel-style renders won’t land. We’ve found that operators who brief us with reference imagery from their brand guidelines produce far stronger results than those who leave the aesthetic direction to us.
What Planning Authorities Actually Need to See
Planning officers reviewing a co-living application are scrutinising a few specific concerns: density, neighbourhood impact, quality of internal environment, and whether the scheme genuinely functions as a residential use rather than a transient one. Your renders need to address all of these, and they need to do it without looking like marketing material dressed up as technical documentation.
There’s a meaningful difference in how renders are received depending on their style. Understanding residential exterior rendering styles compared photorealistic vs sketch vs watercolour which wins planning committees is genuinely useful here — planning committees often respond differently to highly photorealistic images than they do to contextual illustrations that prioritise neighbourhood fit and massing over surface detail.
For the exterior, the render needs to show the building in its actual street context. Not floating in white space. Not cropped to hide the neighbouring buildings. Officers want to assess how the scheme responds to its surroundings, what it does to the streetscape, and whether the scale is appropriate. This means accurate site context modelling — nearby buildings at correct heights, existing trees, street furniture, and ideally some sense of pedestrian activity at ground level.
Daylight and shadowing is another area where co-living schemes face scrutiny, particularly when they’re going into tight urban infill sites. Submitting accurate daylight simulation in architectural rendering how accurate sun studies are helping developers beat planning objections alongside your main visuals can directly reduce the risk of objections from neighbouring occupiers or from the planning officer themselves.
Floor plan renders matter more than most operators realise at planning stage. A 3D floor plan rendering of a typical floor helps planners understand the relationship between private rooms, shared circulation, and communal spaces in a way that flat CAD plans simply don’t communicate. Show the amenity floors separately. Show the rooftop or ground-floor activation zones at a level of detail that makes the use obvious.
Building the Investor Deck Visual Package
Investor presentations for co-living are closer to hospitality pitches than they are to standard residential investment decks. The people committing capital want to see an operational concept, not just a building. They’re buying into an operating model, and the renders need to support the story of what daily life looks like in the scheme.
This is where animated walkthroughs can be particularly effective. A well-produced 3D walkthrough vs 3D flythrough which presentation format wins more real estate approvals is worth understanding before you commit to a format — for co-living investor pitches, a first-person walkthrough that moves from arrival through the lobby, into communal spaces, and then into a private room tends to work better than an aerial flythrough, which suits masterplans and large mixed-use schemes more naturally.
Static renders for the investor deck should follow a deliberate sequence. We recommend structuring the visual narrative this way:
| Render Type | Purpose in Investor Deck | Notes |
|---|---|---|
| Aerial context render | Establish location and site value | Show transport links, proximity to employment |
| Exterior hero shot | First impression of the brand | Evening lighting often works well for co-living |
| Main co-working/lounge | Demonstrate amenity quality | People in renders help convey occupancy feel |
| Shared kitchen/dining | Show the social infrastructure | Critical for demonstrating the concept works at scale |
| Private room render | Reassure on room quality and size | Show smart storage, natural light |
| Outdoor amenity | Lifestyle premium signal | Rooftop or courtyard depending on scheme |
| 3D floor plan (amenity floor) | Show spatial logic clearly | Useful for operator efficiency discussions |
This sequence mirrors how a well-structured investor presentation flows — from macro to micro, from neighbourhood to room. When the renders are produced to support that narrative order, the deck feels coherent rather than like a collection of images bolted onto a financial model.
Public Consultation: The Often-Overlooked Audience
If your scheme requires a public consultation event — and many co-living applications in urban areas do — the renders need to function in a completely different context. You’re not presenting to someone with a development background who can read drawings. You’re presenting to local residents who may be instinctively cautious about density, noise, or character change.
There’s a reason why why architects are replacing physical planning boards with interactive 3d renders at public consultation events has become such a common conversation — static boards with technical drawings alienate most of the people you’re actually trying to engage. Interactive renders, or at minimum large-format photorealistic visuals with clear annotations, help the public understand what’s actually being proposed rather than projecting fears onto something they can’t visualise.
For co-living specifically, it’s worth including a render or visual that shows the ground floor activation — how the building meets the street, whether there are retail or café uses, what the entrance looks like in use. This directly addresses the most common community concern, which is usually about how the building will feel from the pavement, not what goes on inside it.
Common Mistakes Operators Make With Their Render Briefs
The most consistent problem we see is operators producing renders at two incompatible moments: once for the planning submission, and then again — completely separately — for the investor deck. The result is two sets of images that look like different schemes. Materials shift slightly, room layouts change, the communal spaces look different. This creates real problems when an investor receives marketing material that doesn’t match what’s been submitted for planning, and it’s an entirely avoidable cost.
The second most common issue is level of detail. For planning submissions, operators sometimes over-specify, asking for fully dressed photorealistic interiors when the planning authority would be equally satisfied with clearly articulated spaces at a lighter LOD. Understanding what level of architectural detail do you actually need in a 3d rendering lod 100 to lod 400 explained for developers can genuinely save money without compromising the outcome. Equally, some operators under-specify for investor presentations and then wonder why the deck doesn’t convert.
The third issue is briefing renders without deciding who they’re for. A render that tries to please planners, investors, and a future marketing campaign simultaneously usually ends up doing none of them well. Before you commission anything, decide: is this image for planning? For investors? For pre-launch marketing? The answer affects camera angle, styling, level of finish, and how people are used in the scene.
Coordinating Across Your Design and Commercial Teams
One practical point that saves significant time and budget: co-living operators often have a design architect, an interior designer, and a commercial director all involved in the pre-planning stage, and they don’t always share files efficiently. When we receive a brief for a co-living scheme and the architectural drawings, interior design intent, and brand guidelines arrive in three separate emails two weeks apart, the project takes longer and costs more than it needs to.
The most efficient approach is to consolidate everything — floor plans, elevations, material schedules, furniture layouts, brand colour references — before the render studio starts modelling. We’ve written about how to brief a 3D rendering studio what architects and developers need to prepare before project kickoff elsewhere, and for co-living it’s especially relevant because of the number of stakeholders involved. A single, consolidated brief with sign-off from all internal parties means you’re not paying for model revisions caused by internal miscommunication.
It’s also worth thinking about whether your scheme would benefit from a 3D 360 virtual tour rendering for investor and pre-launch purposes. Co-living sells on experience, and a 360 tour of the key amenity spaces gives remote investors — many of whom won’t visit the site before committing — a far more convincing sense of the scheme than static images alone.
Conclusion
Co-living is a genuinely complex asset class to visualise well, and the render brief is more demanding than most operators initially expect. You’re building a visual case on multiple fronts simultaneously — planning compliance, investor confidence, and public understanding — and each audience reads the same images with different eyes. Getting that right requires thinking about the render package as a communication strategy, not just a production task.
If you’re preparing a co-living scheme for planning submission or investor presentation and want to talk through what visuals you actually need, our team at 360archviz works with operators at all stages of the process. Contact us to discuss your project and we’ll help you build a brief that covers every audience without duplicating effort or budget.
Frequently Asked Questions
What types of 3D renders do co-living developers need to submit for planning approval?
Co-living developers typically need to submit a combination of photorealistic exterior CGIs, accurate streetscape visuals, internal communal space renders, and contextual aerial views that show how the development integrates with the surrounding neighbourhood. Planning authorities increasingly expect renders to reflect accurate materiality, massing, and scale rather than idealised representations. Some local councils also require daylight and sunlight study visuals or shadow impact diagrams to accompany the standard CGI package.
How can 3D rendering help co-living operators secure investor funding before a project is built?
High-quality 3D renders allow investors to visualise the finished product in full detail, reducing perceived risk by demonstrating design quality, space efficiency, and brand positioning before a single brick is laid. Renders of amenity spaces like co-working areas, communal kitchens, and roof terraces are especially persuasive because they communicate the lifestyle offer that drives rental premiums and occupancy rates. A professional CGI package also signals operational maturity, which builds confidence among institutional investors evaluating a co-living operator for the first time.
What is the difference between a planning CGI and a marketing render for a co-living development?
A planning CGI must adhere to strict accuracy guidelines set by local planning authorities, showing true-to-life materials, correct proportions, and realistic contextual settings without embellishment or flattering lighting that misrepresents the scheme. Marketing renders, by contrast, are produced to attract tenants and investors and can use aspirational styling, curated furniture, and mood-enhancing lighting to communicate lifestyle appeal. Co-living operators often commission both types from the same studio, ensuring consistency between the approved scheme and the materials used in leasing campaigns.
How much does a full 3D rendering package for a co-living planning submission typically cost?
The cost of a 3D rendering package for a co-living planning submission varies depending on the size and complexity of the scheme, but operators should typically budget between £5,000 and £25,000 for a comprehensive set of planning-grade CGIs covering exteriors, context views, and key interior spaces. Larger mixed-use co-living schemes with significant public realm elements or heritage sensitivities can push costs higher due to the level of detail and additional viewpoints required. Investing in quality at this stage is generally cost-effective because weak visuals can delay planning decisions or prompt requests for additional information, adding time and expense to the process.
Can 3D renders be used to address objections from local authorities about a co-living development's impact on the streetscape?
Yes, accurately produced contextual CGIs and verified view renders are one of the most effective tools for demonstrating to planning officers and design review panels that a co-living scheme respects and enhances its surrounding streetscape. By showing the proposed building inserted into existing street photography or drone footage at precise eye-level viewpoints, operators can directly counter concerns about massing, overshadowing, or visual intrusion with evidence-based visuals. Animated walkthroughs or interactive 3D models can further support pre-application discussions, helping local authorities understand the scheme from multiple perspectives and reducing the likelihood of design-related objections at the formal submission stage.